TAKE NOTE (Insights and Emerging Technology)

|
Interested in learning more about RPA? Download our FREE White Paper on “Embracing the Future of Work”

UNDER DEVELOPMENT (Insights for Developers)
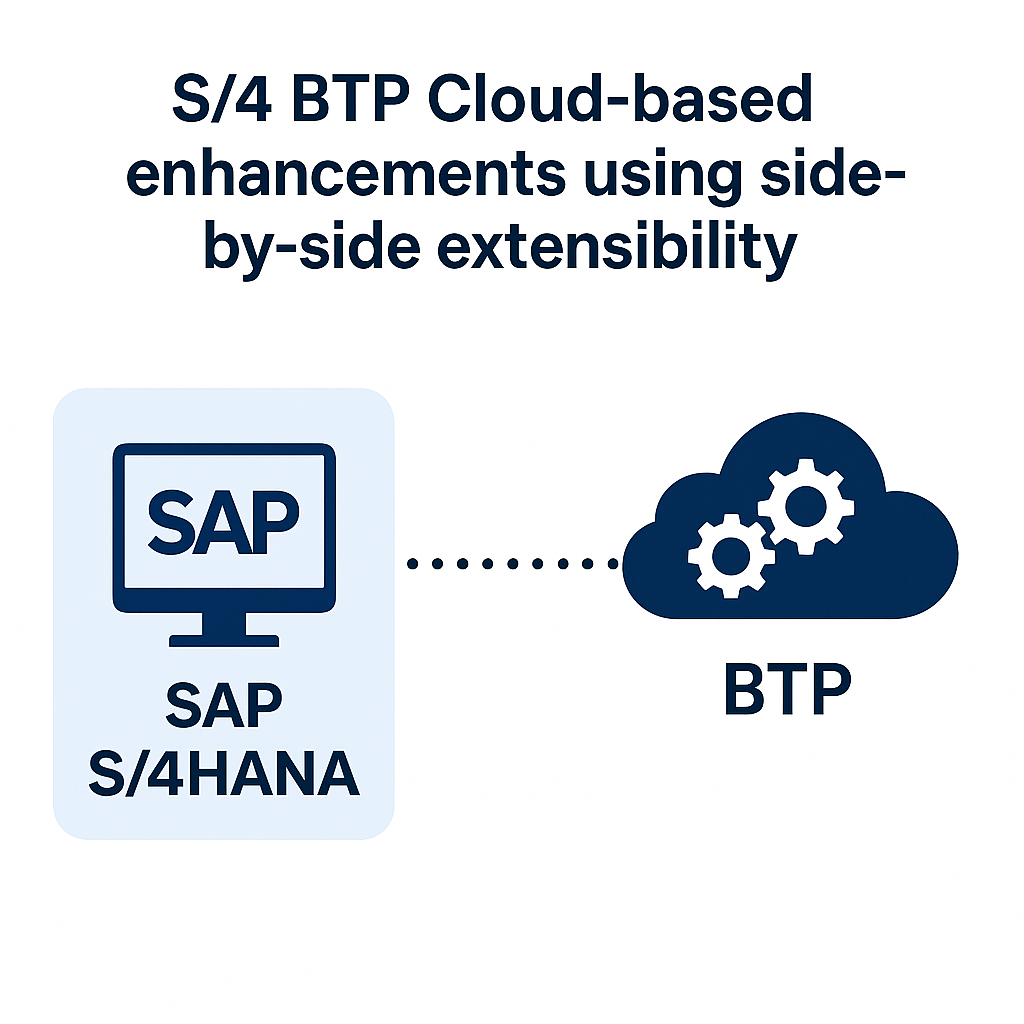
S/4 BTP Cloud-based Enhancements using Side-by-Side Extensibility Part 4
Intro
In this fourth and final entry in our BTP /Event Mesh blog series, we will be completing the final step to configure our “Sales to Tweet” extension. In this step, we need to create a connection to “Twitter”/”X” to allow our ABAP extension to post tweets.
To create this integration, we will be utilizing the Integration Suite, and creating a very simple iFlow. Once created, we will use a service key and our ABAP extension to bring the whole solution together.
Creation of our iFlow solves the fourth and final question: Problem 4: A business’ primary function is to interact with parties that are external to our software ecosystem. How can we communicate with partners if don’t have a PO/PI system?
![]()
Creating The iFlow
To get started, we’ll need to create an instance of the Integration Suite. Same process as always, picking the appropriate plan for your usage. Also, we’ll need to make sure we have the appropriate roles to create iFlows. The first time Integration Suite is set up, it requires a multi-step role provisioning process. This is because before we first need to choose which features of the Integration Suite we want to utilize before we can actually assign the appropriate roles for those components. Initially then, we will only assign the Integration Provisioner role and will come back later to fully provision our developer user.
After assigning the Integration Provisioner role (and making sure to log out and log back in to allow it to take affect!) we can click the Integration Suite link from the subscriptions section of our subaccount. This will open a rather bare Integration Suite landing page:

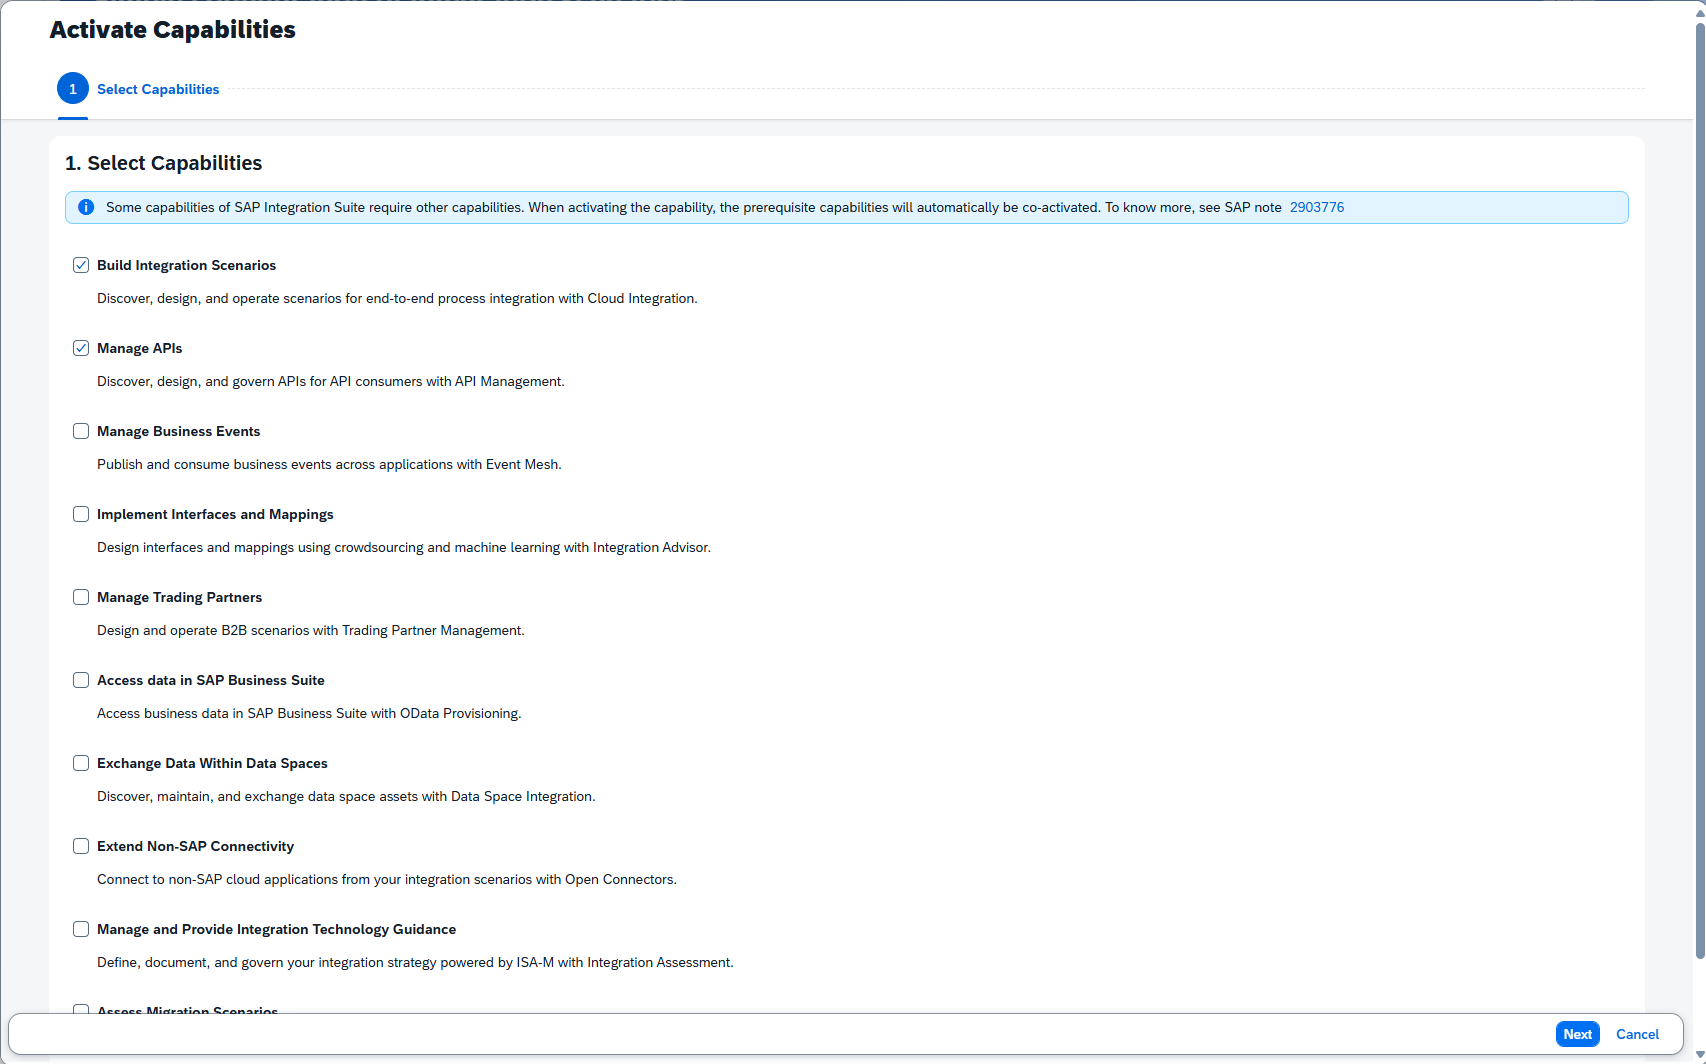
This is blank because we have not yet added any capabilities to our Integration Suite. To do so, we can click the “add capabilities” button and proceed through the guided steps to configure out IS environment. There are a wide range of options in the IS, from integrations, to integration guides. There’s even an included Event Mesh instance (if you prefer to house the event mesh here instead of a standalone environment). For our purposes, we only select the following options in the screenshot, then follow this step with the additional options below:
With the capabilities added, we can now add the remaining roles required to create our iFlow. To do this, return to the BTP Subaccount dashboard and add the following roles to your user:
PI_Integration_Developer
PI_Administrator
With those roles assigned, we can return to our Integration Suite instance and generate our Runtime. To do this, click the dropdown next to the “Settings” option and Select “Runtime”.
For here, I picked “Non-Production”, picked an appropriate Virtual Host, and entered my own email as the IS admin. Then finally, click “Activate” to begin the activation process
– Dig Deeper –
SAP Event Mesh Interview Questions and Answers
Q&A (Post your questions and get the answers you need)

Q.
A.
HOLIDAY MESSAGE