Anthony Cecchini is the President of Information Technology Partners (ITP), an SAP consulting company headquartered now in Virginia, with offices in Vienna. ITP offers comprehensive planning, resource allocation, implementation, upgrade, and training assistance to companies. Anthony has over 20 years of experience in SAP business process analysis and SAP systems integration. ITP is an Appian iBPM Low-code and RPA Value Added Service, Partner. You can reach him at [email protected].
Last month we took a high-level view of the Appian intelligent BPM (iBPM) platform. We saw that Appian iBPM Solutions remain the best-in-class primarily due to its focus on the business user by enabling them to improve business decisions. The Appian Platform is designed to make it easy to build robust enterprise applications with a combination of low-code development and business process management (iBPM) tools. So let’s build our first Appian Application together…
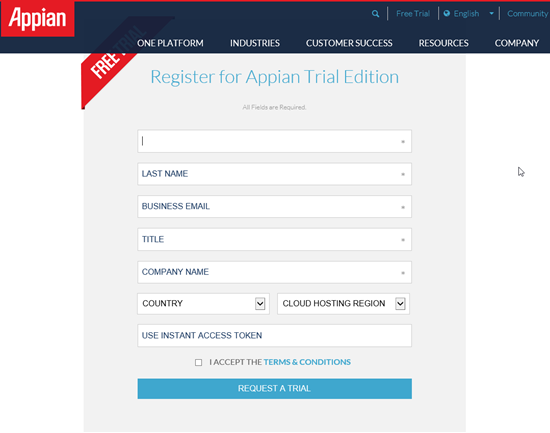
Get the Appian FREE Trial
You can register for a free trial. Appian will not accept non-business emails for the trial, so you will need to use your work email. If Appian does not accept your credentials, then you can try again or contact customer support for a download key.
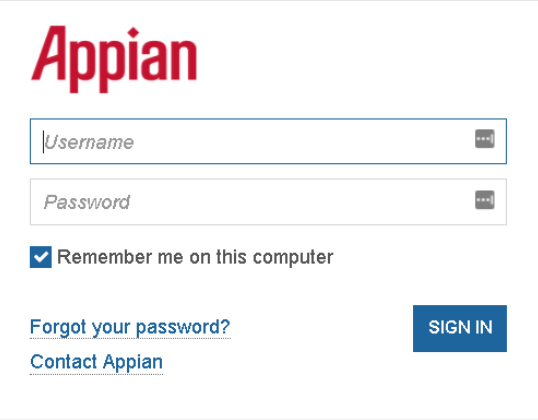
Appian will send you a verification email. After you verify your email address, Appian will email you a username, a one-time link to the free trial, and a temporary password. The link expires after one week. Click on the link, enter your information, and you will arrive at the Appian Platform Home Page. Go ahead and sign in..
Let’s jump right in and start with creating an application.
Creating An Appian Quick App
Click on the red “Get Started” button on the left side of the screen
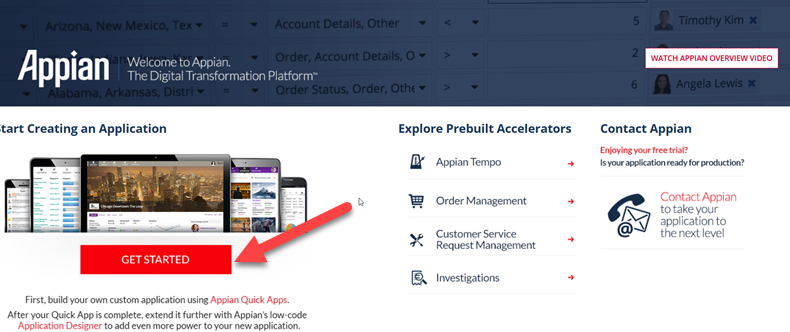
This will take you to the Quick Apps Designer page. This is the home page for where you can build BPM applications customized to your needs. It’s called an app development area, but Appian has designed it so that you don’t need coding or development skills. The idea is that anyone can use the interactive tools to create a workflow that tracks data in spreadsheets, documents, emails, and so on. Appian designed to be easy to create and modify, so let’s see walk through an example…
Creating a Quick App is a 3 step process:
1. Name and describe your Quick App.
2. Design the interfaces
3. Share access with others
Name and Design Your Quick App
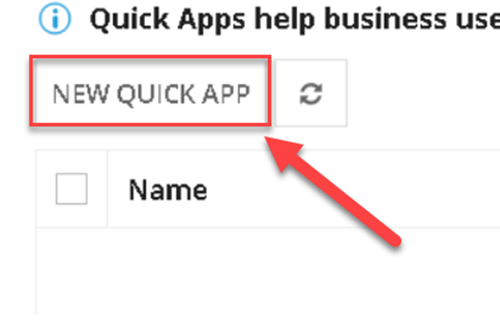
Open the Quick App Wizard by clicking on the New Quick App button. It’s a little hard to see because it has no color, but it’s on the top left of the Quick App Home Page.
The Wizard Window will open. For this example, we will create a simple app to track phone messages.
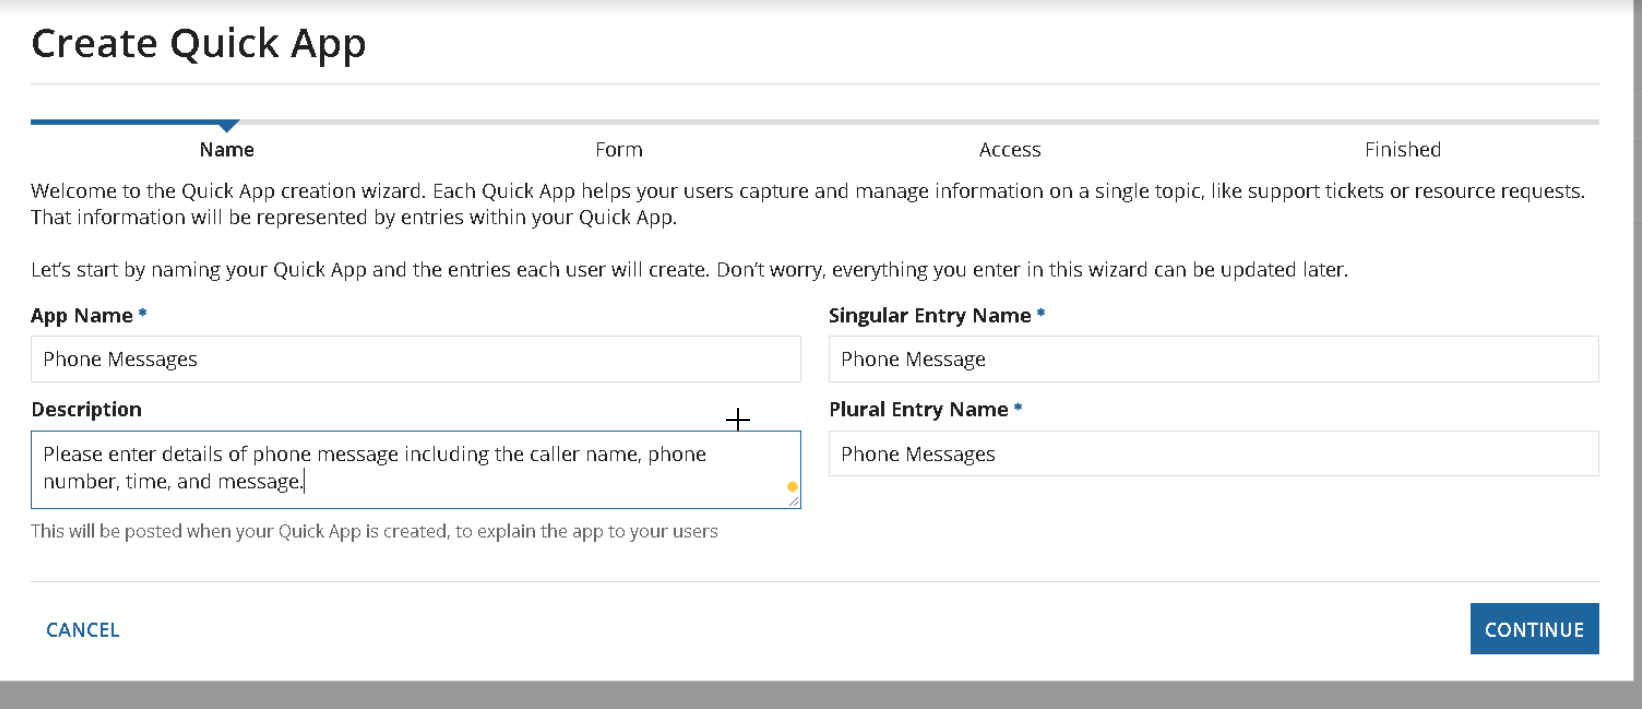
Fill out the name and description of your Quick App. The Wizard will fill out the singular and plural fields for you, but you can adjust them if you’d like. Click the “Continue” button. The next page in the Quick App Wizard will ask you for more details about each field on the firm. It will make suggestions to help you along, but you make the final decision.
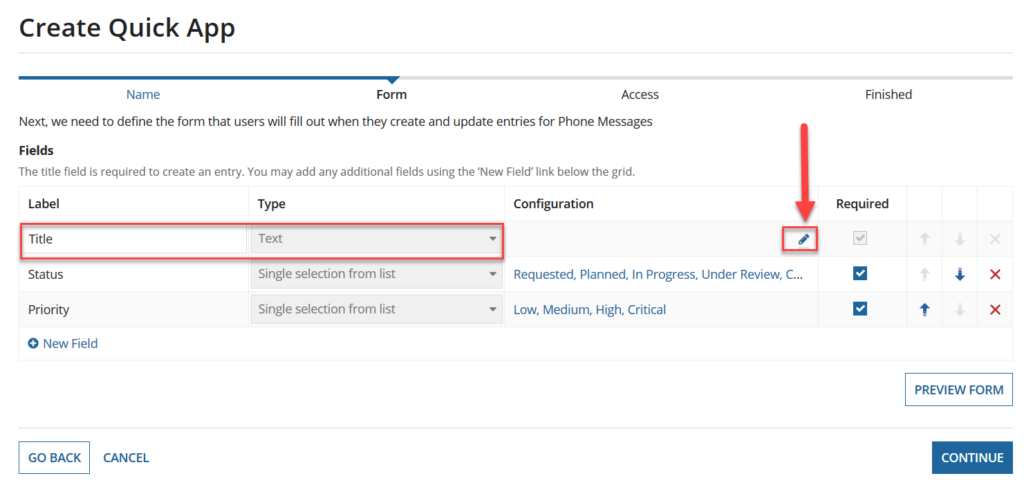
Design the Interfaces
We’ll reconfigure the Title to ask the user to put in the name of the caller. Click on the pencil icon in the configuration field to make changes. Choose “Update Field” when you are finished.
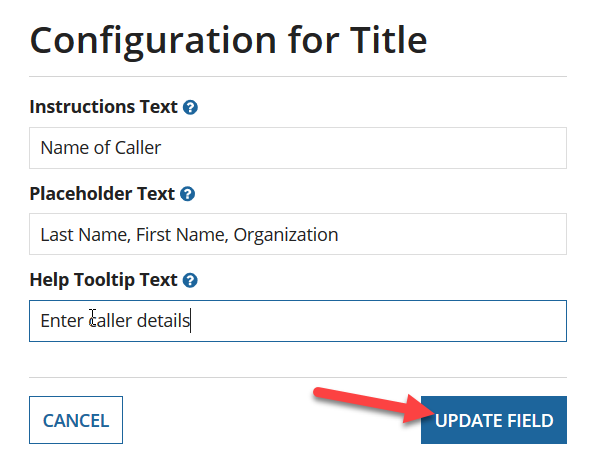
Let’s go ahead and make the changes in the Configuration for title…
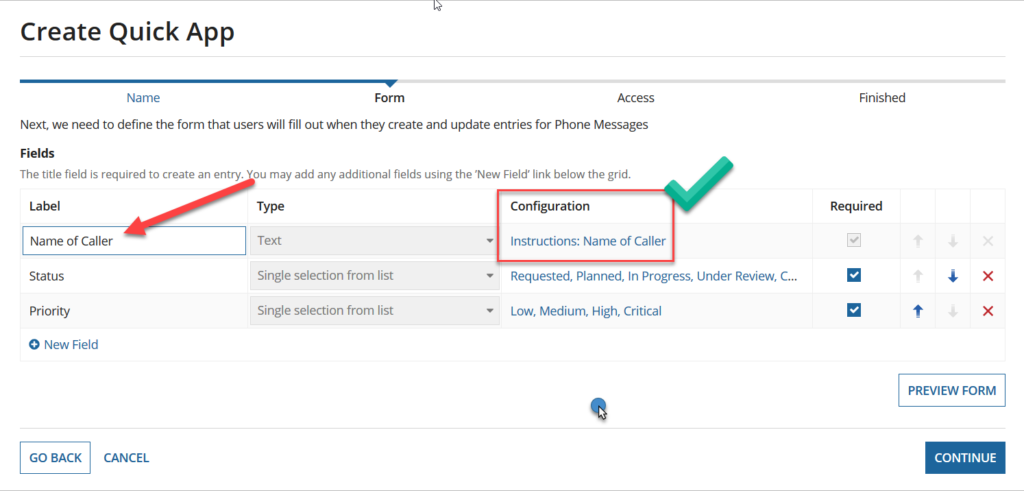
Note that the configuration field is updated. Next, we’ll change the LABEL “Title” to “Name of Caller” to clarify what the field is being used for on this Quick App Form.
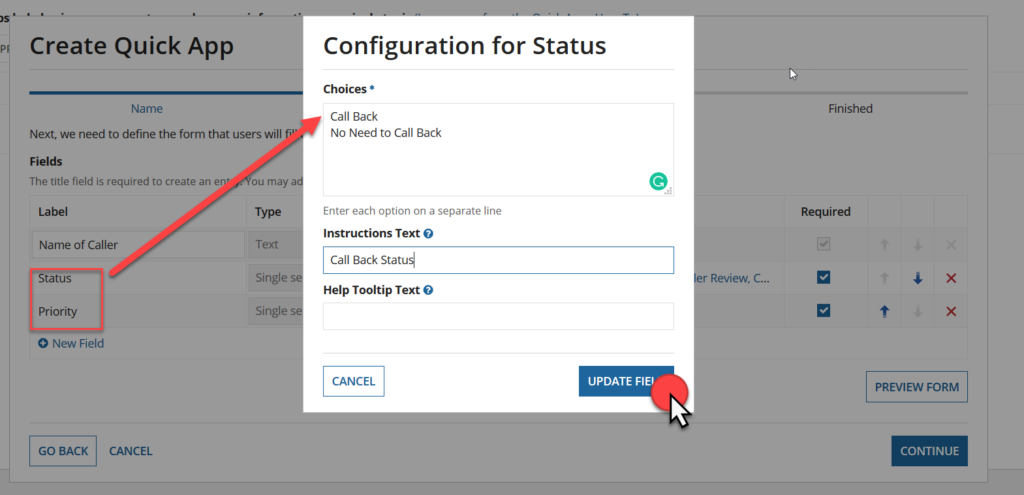
Take a look and you will see we still have two fields left, STATUS and PRIORITY. Priority looks OK, but let’s go ahead and update the configuration status. Let’s change the predefined list with our own. Let us add “Call Back” and “No Need to Call Back”. DONT FORGET TO HIT THE UPDATE FIELD BUTTON!
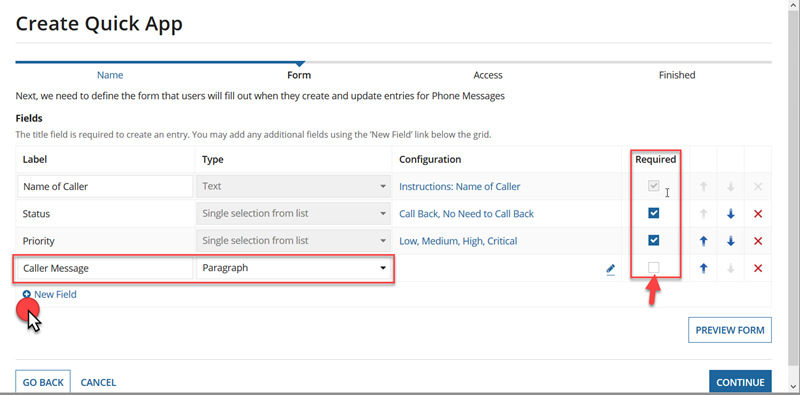
OK, let us preview the form. Looks good so far. If you had entered Tooltip Help text, you will see blue ? next to each field that will help prompt a user to enter the correct entries. Hmm… Something is still missing… Oh right, let’s add and field to take any message that a caller would want to leave. OK Click on + NEW FIELD at the bottom of the screen, lower left under the label “PRIORITY”. Then let’s add a label called “Caller Message“, let’s make the TYPE be “PARAGRAPH”, then let’s BE SURE it’s NOT REQUIRED and is OPTIONAL
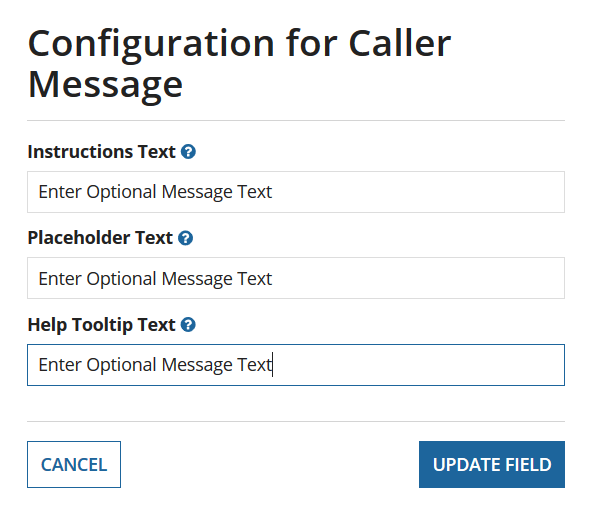
Now we can click on the pencil ICON and update the configuration for our new field. DO NOT FORGET TO HIT THE BLUE UPDATE FIELD BUTTON
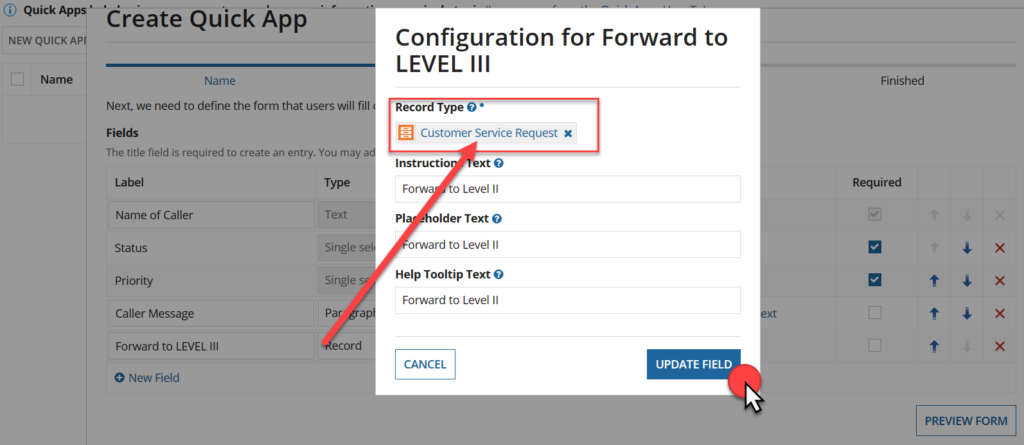
OK, one more thing… Let’s say this was a HELP DESK and we were LEVEL I&II. We took a message but needed to create a ticket or Customer Service Request for LEVEL III support. We can easily do this in Appian. All we need to do is add a field just as you did for the Messages, but this time choose “Record” as the field type. The Wizard will automatically fill in “Choose a Record Type” in the configuration column in blue. Click on the blue text. The configuration pop-up window will appear again, but this time it will ask you to choose a record type. There are several options available, so start typing “Customer …,” and you will see the Customer Service Request as an option.
When you are finished, DO NOT FORGET TO CLICK ON THE BLUE UPDATE FIELD BUTTON!
Click on Form Preview too see what you’ve done. Now when a customer calls, the person answering can take a message or open a service request as appropriate.
Create and Share an Appian Quick App
Now we are getting to the real power behind the Appian platform to manage iBPM. After you save the form, click on Continue to share access with others. The trail falls short on this feature because no other users are available to share your App with, but you get the idea. The Appian platform creates a group when you give access to an application. You can search previously created groups or mix and match to create your own set of users.
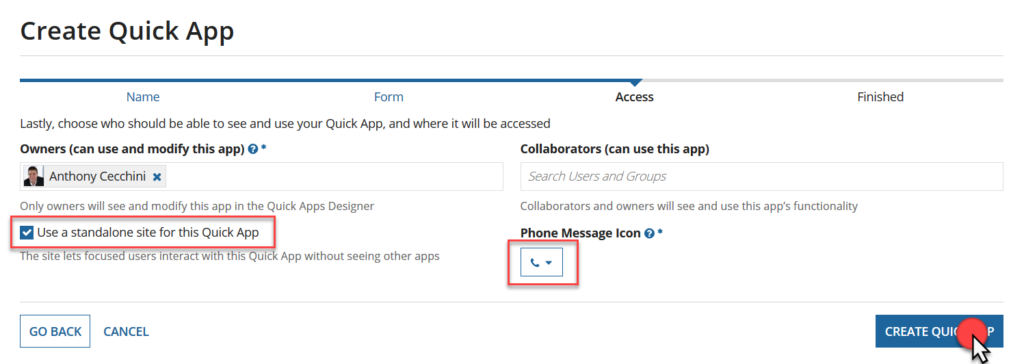
Let’s make sure the “use a standalone Site for this Quick App is Checked, and choose an Icon for the Quick App. I chose a telephone icon but you can search for one as well. Go ahead and create the Appian Quick App by hitting the blue Create Quick App Button. Please be patient, as it may look like nothing is happening, but it is and the screen will eventually return with a successfully created message!
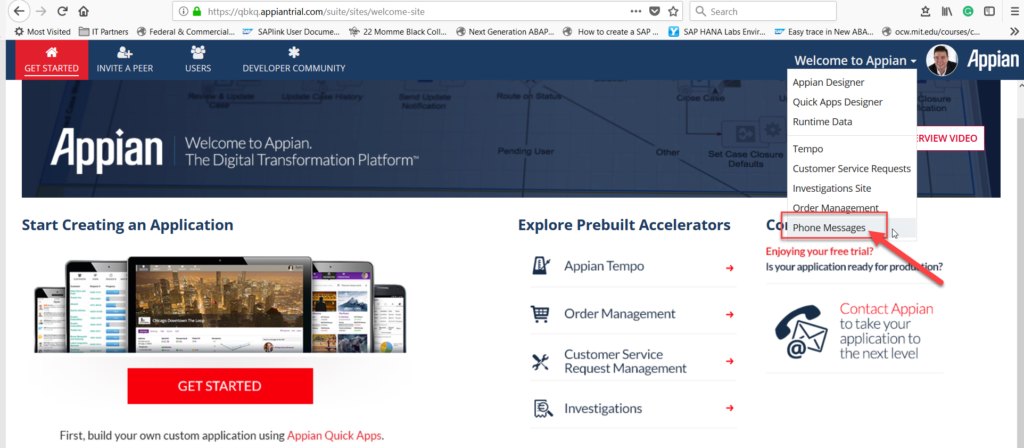
Once the Appian Quick App is created you can now use it. You can find it on the Dashboard under the “Welcome to Appian” Menu in the upper right-hand corner.
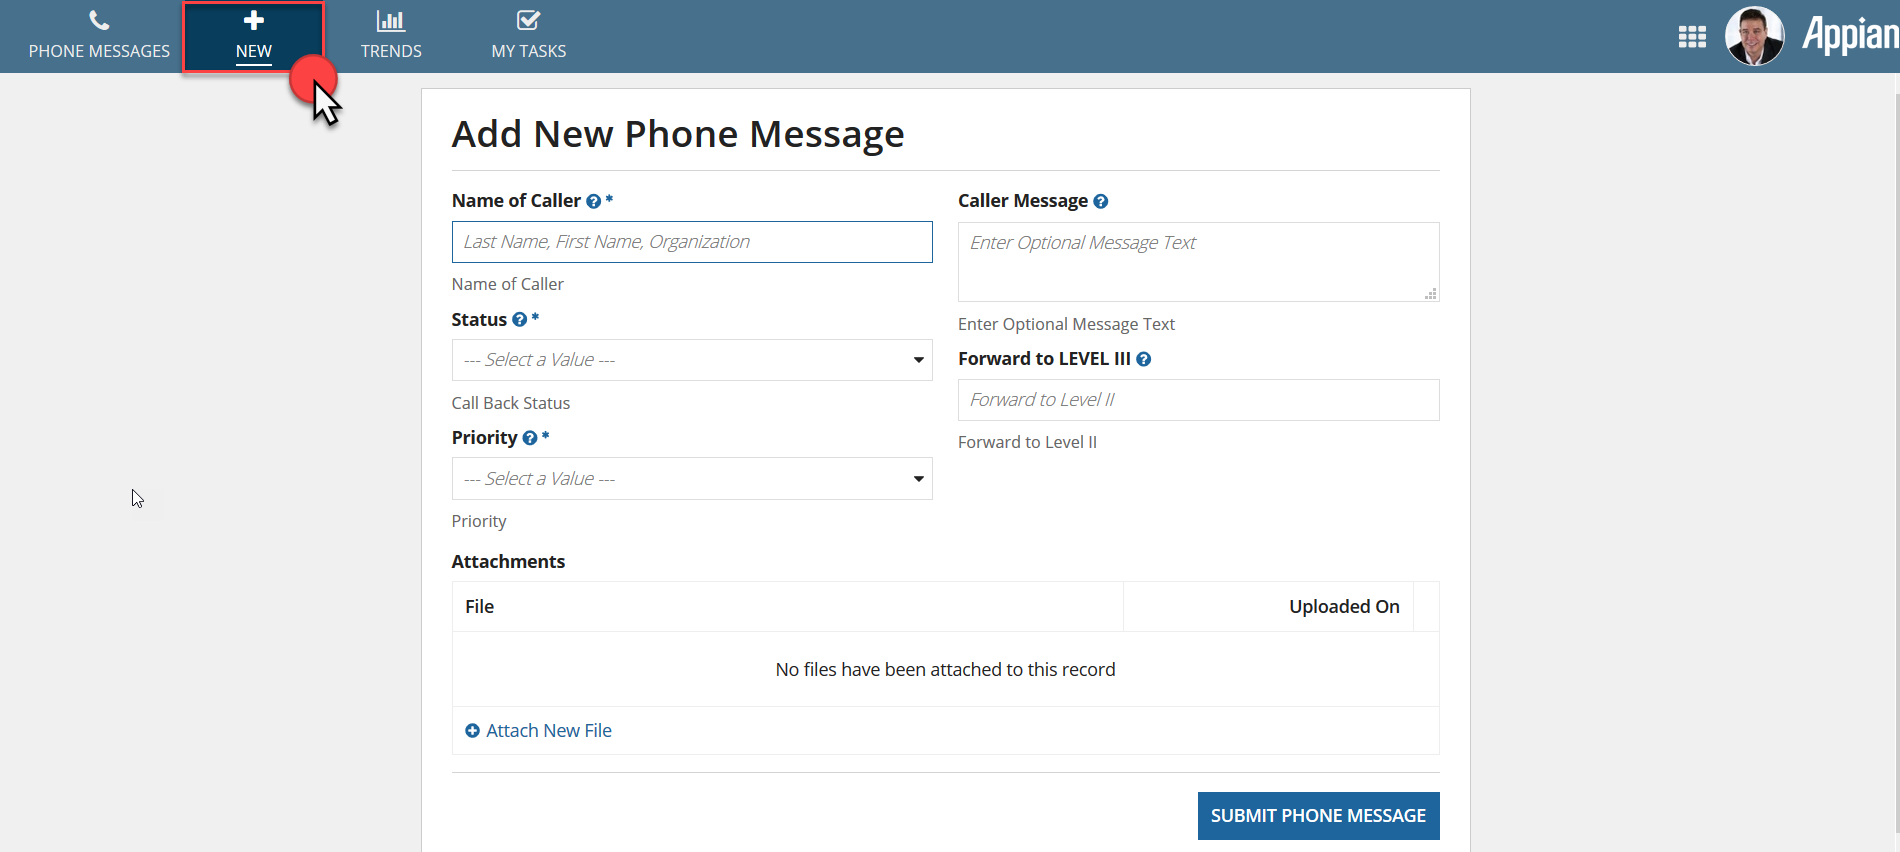
Click on this and our Quick App will launch. Click on the “Add New” label at the top and the FORM we create will appear.
Summary
WHAT WILL YOU CREATE?